Restaurant Style Jeera Rice Recipe (Jeera Pulao)
Table of Content
|
About Restaurant Style Jeera Rice
|
|
Ingredients
|
|
Methods
|
|
Like restaurant style jeera rice
|
|
Method for restaurant style jeera rice
|
|
Tips for restaurant style jeera rice
|
|
Nutrient values
|
restaurant style jeera rice | jeera pulao | authentic jeera rice | with amazing 18 images.
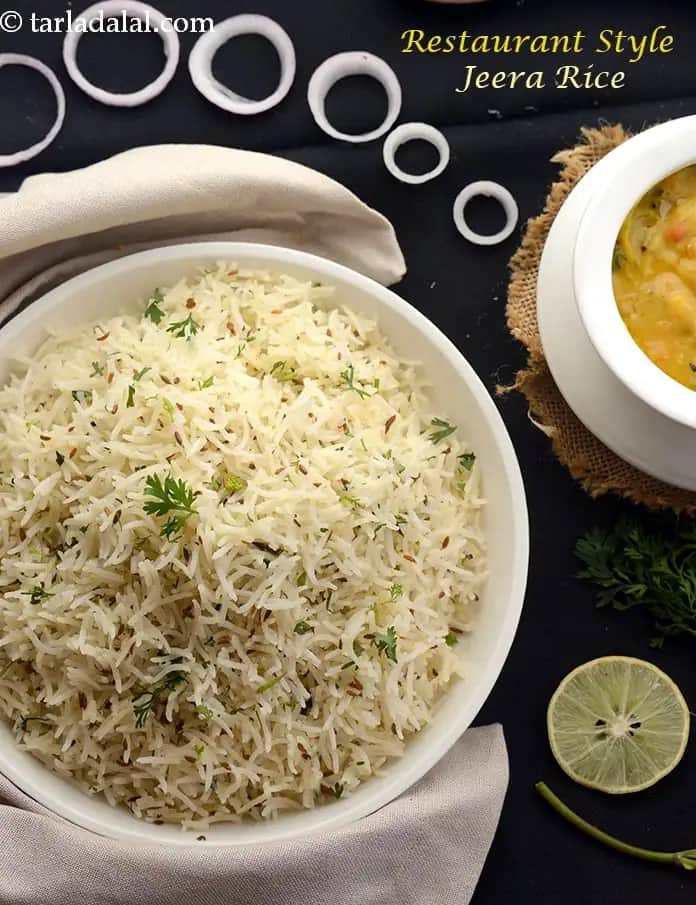
restaurant style jeera rice is a flavour-packed rice preparation with the enticing and appetizing aroma of jeera. Made with minimal ingredients, rice, jeera, oil, coriander, and ghee can create a restaurant style jeera rice dish worthy of the lords, then this is it!
restaurant style jeera rice or restaurant style jeera pulao is a simple preparation of rice that has been flavoured with jeera or cumin seeds, which is quick and easy to make.
This versatile restaurant style jeera pulao preparation can be eaten as an accompaniment with almost any Dals / Kadhis or Subzis / Curries. restaurant style jeera pulao with plain curd and pickle or just topped with some ghee is my personal favourite. authentic jeera rice is also one of the highest selling dish is Indian restaurants. It has made its place in the menus of a roadside dhaba to a 5-star hotel.
If you are an amateur and do not understand when the rice grain is cooked, while soaking the rice, you can add 3 drops of lemon juice to ensure that after cooking each grain of rice is separate. Soaking is very important as it reduces the cooking time of authentic jeera rice. The rice grain will absorb moisture and you’ll be less likely to have broken grain while cooking.
Coriander peps up the rice further, while a dollop of melted butter added at the end gives the rice a pleasant yellow tinge and a tempting shine, which you are sure to notice whenever you order Jeera Rice at restaurants. Jeera or zeera is the core ingredient in this recipe, you can slightly crush them for the best result. Along with cumin, a few other whole spices like bay leaves, cloves, and cinnamon can also be added.
If possible, serve this restaurant style jeera rice immediately to enjoy a burst of flavours along with the crackling crispness of cumin seeds.
Enjoy with your favourite dal fry and roasted papad or Roasted Khichiya Papad as an accompaniment.
Learn to make restaurant style jeera rice | jeera pulao | authentic jeera rice | with detailed step by step recipe photos and video below.
Restaurant Style Jeera Rice recipe - How to make Restaurant Style Jeera Rice
Tags
Soaking Time
30 minutes
Preparation Time
5 Mins
Cooking Time
10 Mins
Baking Time
0 Mins
Baking Temperature
0
Sprouting Time
0
Total Time
15 Mins
Makes
4 servings
Ingredients
For Restaurant Style Jeera Rice
- 1 tbsp cumin seeds (jeera)
- 1 cup long grain rice (basmati chawal)
- 1 tbsp oil
- 1 tbsp ghee
- salt to taste
- 1 tbsp finely chopped coriander (dhania) , optional
- 1 tbsp melted butter
Method
For restaurant style jeera rice
To make restaurant style jeera rice, wash and drain the rice thoroughly.
Combine the rice along with enough water in a deep bowl, cover it with a lid and keep aside to soak for 30 minutes. Drain well and keep the rice aside.
Boil enough water in a deep non-stick pan and add the salt and rice to it. Mix well and cook on a medium flame for 6 minutes, while stirring occasionally.
Strain it using a strainer and transfer it into a flat plate immediately. Spread it evenly using a flat ladle and keep aside to cool completely (for approx. 30 minutes). Remember to toss the rice gently once in a while to ensure that all the steam gets evaporated.
Heat a broad non-stick pan and add the oil and ghee.
When the ghee melts just slightly, add the cumin seeds and sauté on a medium flame for 10 seconds. Remove the pan from the flame, add the cooked rice, a little salt and coriander and mix gently.
Put the pan back onto the flame and cook it on a high flame for 1 to 2 minutes, while tossing gently but continuously.
Add 1 tbsp of melted butter and mix gently.
Serve the restaurant style jeera ricehot.
Handy tip
While soaking the rice, you can add 3 drops of lemon juice to ensure that after cooking each grain of rice is separate.
Restaurant Style Jeera Rice Recipe (Jeera Pulao) Video by Tarla Dalal
Restaurant Style Jeera Rice recipe with step by step photos
-
- If you like restaurant style jeera rice | jeera pulao | authentic jeera rice | given below is the list to similar recipes :
-
-
To prepare the restaurant style jeera rice | jeera pulao | authentic jeera rice | wash and drain the rice thoroughly. Choose a good quality, aged rice to get perfectly cooked rice. Washing helps to remove the extra starch from the rice.
-1-188944.webp?w=800&format=webp)
-
Combine the rice along with enough water in a deep bowl.
-2-188944.webp?w=800&format=webp)
- Cover it with a lid and keep aside to soak for 30 minutes. If you are an amateur and do not understand when the rice grain is cooked, while soaking the rice, you can add 3 drops of lemon juice to ensure that after cooking each grain of rice is separate. Soaking is very important as it reduces the cooking time of rice. The rice grain will absorb moisture and you’ll be less likely to have broken grain while cooking.
-
After half an hour, drain well and keep the rice aside.
-4-188944.webp?w=800&format=webp)
-
Boil enough water in a deep non-stick pan for cooking the rice and add the salt. It is preferable to add salt at this stage as it cooks the rice faster and the grains don’t taste bland after cooking.
-5-188944.webp?w=800&format=webp)
-
Add soaked and drained rice to the boiling water.
-6-188944.webp?w=800&format=webp)
-
Mix well and cook on a medium flame for 6 minutes, while stirring occasionally. The rice grain must be fully cooked yet firm (about 85%). Do not overcook them or else they will turn soft and mushy.
-7-188944.webp?w=800&format=webp)
-
Strain it using a strainer to get rid of excess water. The more the moisture, the soggy the rice would be so, drain very well to get perfectly cooked basmati rice.
-8-188944.webp?w=800&format=webp)
-
Transfer it into a flat plate immediately. Spread it evenly using a flat ladle and keep aside to cool completely (for approx. 30 minutes). Remember to toss the rice gently once in a while to ensure that all the steam gets evaporated. You can drizzle little oil or melted ghee while spreading so, the rice grains stay separate and don’t stick.
-9-188944.webp?w=800&format=webp)
-
For tempering of cumin rice, heat a broad non-stick pan and add the oil and ghee. If you want to make vegan jeera rice, then substitute ghee with oil.
-10-188944.webp?w=800&format=webp)
-
When the ghee melts just slightly, add the cumin seeds and sauté on a medium flame for 10 seconds. The cumin seeds will crackle immediately releasing all their flavor while the oil is still getting hot. If you add cumin seeds in hot oil, it might get burnt. Jeera or zeera is the core ingredient in this recipe, you can slightly crush them for the best result. Along with cumin, a few other whole spices like bay leaves, cloves, and cinnamon can also be added.
-11-188944.webp?w=800&format=webp)
-
Remove the pan from the flame, add the cooked rice. If you add the rice to the hot oil, they might stick to the bottom of the pan so always take them off the flame.
-12-188944.webp?w=800&format=webp)
-
Add a little salt for additional seasoning.
-13-188944.webp?w=800&format=webp)
-
Add coriander for a dash of fresh flavor. It is important to add dhania at this stage only so, you do not have to toss the jeera rice again and again.
-14-188944.webp?w=800&format=webp)
-
Mix gently. Do not stir the rice vigorously or else it will break the grains.
-15-188944.webp?w=800&format=webp)
- Put the pan back onto the flame and cook it on a high flame for 1 to 2 minutes, while tossing gently but continuously.
-
Add 1 tbsp of melted butter for a beautiful yellowish tinge and shiny texture to zeera rice and mix gently. Our perfect restaurant style jeera rice | jeera pulao | authentic jeera rice | is ready to serve.
-17-188944.webp?w=800&format=webp)
-
Serve restaurant style jeera rice | jeera pulao | authentic jeera rice | hot. Enjoy jeera pulao with dal makhani, dal tadka or dal fry.
-18-188944.webp?w=800&format=webp)
-
To prepare the restaurant style jeera rice | jeera pulao | authentic jeera rice | wash and drain the rice thoroughly. Choose a good quality, aged rice to get perfectly cooked rice. Washing helps to remove the extra starch from the rice.
-
-
Soak the rice for sure as it reduces cooking time.

-
Use only a deep non-stick pan for cooking rice as it has enough space for the rice to cook.
-2-192127.webp?w=800&format=webp)
-
Prefer to add salt to the boiling water so the rice absorbs salt well.
-5-188944-3-192127.webp?w=800&format=webp)
-
The rice cooked for this recipe will be only 85%. The remainingrice gets cooked after draining. This ensures that each grain of rice is separate.
-7-188944-4-192127.webp?w=800&format=webp)
-
You can also add 2 to 3 drops of lemon juice to the rice while cooking to ensure that each grain of rice is separate.

-
Alternatively, you can add a tsp of ghee or oil to the cooked rice and toss it to prevent it from sticking.

-
When the rice starts floating on top it is an indication that the rice is done.

-
Drain the rice very well as the presence of moisture will make the rice soggy.
-8-188944-8-192127.webp?w=800&format=webp)
-
While cooling the rice in a flat plate, remember to toss the rice gently once in a while to ensure that all the steam gets evaporated.
-9-188944-9-192127.webp?w=800&format=webp)
-
Do not let the ghee melt completely. When it is almost melted, add the cumin seeds. This is to prevent them from burning.
-11-188944-10-192127.webp?w=800&format=webp)
-
Prefer to add rice to the tempering by removing the pan from the flame. This is to prevent the rice from sticking to the pan.
-12-188944-11-192127.webp?w=800&format=webp)
-
Addition of melted butter in the end is a must to get the perfect yellow colour like the restaurant.
-17-188944-12-192127.webp?w=800&format=webp)
-
Soak the rice for sure as it reduces cooking time.
Nutrient values (Abbrv)per plate
| Energy | 232 Calories |
| Protein | 3.0 g |
| Carbohydrates | 33.7 g |
| Fiber | 1.8 g |
| Fat | 9.4 g |
| Cholesterol | 7 mg |
| Sodium | 25 mg |
Click here to view Calories for Restaurant Style Jeera Rice
The Nutrient info is complete
Asmawajju
Oct. 1, 2020, 2:21 p.m.
khyati
April 8, 2018, 4:14 p.m.
Tarla Dalal
April 8, 2018, 4:14 p.m.
Khyati, Thanks for the feedback. It does help others use the site for its information.
Amazing
May 20, 2017, 7:39 p.m.
Tarla Dalal
May 20, 2017, 7:39 p.m.
Thanks for the feedback !!! Keep reviewing recipes and articles you loved.
Foodie #679283
June 14, 2016, 12:05 p.m.
Tasty Jeera rice recipe. Had it with Sultani Dal and the combination turned out to be outstanding.
khyati
Oct. 8, 2014, 10:09 a.m.
Nisha
March 16, 2013, 11:27 a.m.
Too good... Totally justifies the name.... I made this jeera rice with dal tadka and my mother in law applauded me a lot. Thanks a lot for this and many more such authentic recipes which I cook very often in my kitchen.


